Introduction
This article compiles my personal insights from the process of successfully jailbreaking my Kindle Scribe. For those curious about it, you may follow along, and maybe even jailbreak your own Kindle. Be aware this is moreso of a collection of my findings for jailbreaking my Kindle rather than a complete “step-by-step” guide. Credit goes to all original developers.
Disclaimer: If you choose to follow my steps, I am not responsible for any damage you incur to your Kindle, remember this device is one of the more susceptible to “bricking”. Be cautious and read ahead carefully, and remember this was written for the LanguageBreak exploit launched in late 2023.
Why
If you must ask, then this probably isn’t for you ;)
But if you really want to know, follow this guide you will have these features available over the stock Kindle:
- Vastly superior epub and PDF reading (through KOReader, a 3rd party ereader app)
- Disable auto-lock (stock default is 10 minutes, and immutable)
- Greater customizability (theoretically)
- SSH/Terminal access
- Disable OTA updates (A positive for those against unsolicited updates)
- Wirelessly manage sideloaded books
- Limit Kindle telemetry
- “And more”
Jailbreak
Prerequisites
I recommend reading this whole post before proceeding.
- Your Kindle Scribe must be on firmware 5.16.2.1.1 or below.
- Your Kindle WILL be FACTORY RESET by this process. Backup all files. I used the open-source file manager FreeFileSync for this. If you choose not to use a 3rd party tool, be sure to backup the hidden “System” and “.notebook” folders.
- Take a picture of any sideloaded books in the “collections” feature on Kindle. They will not be preserved, and you will have to manually reorganize them when everything is done.
- If using Windows, download a program to open
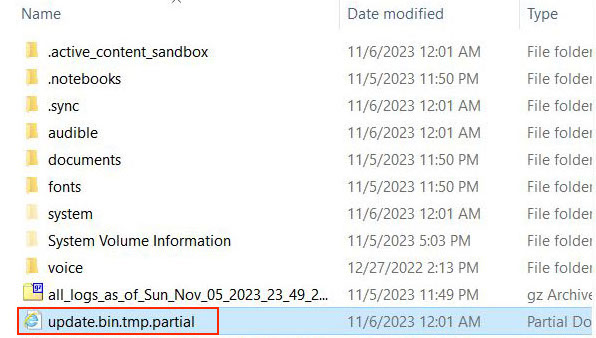
tar.gzfiles, such as 7-Zip - Delete any
update.binorupdate.bin.tmp.partialfiles on your Kindle
The 100-foot overview
Roughly here is the order of what “jailbreaking” will accomplish.
- Jailbreak for arbitrary code execution (run non-amazon code)
- Install “hotfix”, so that jailbreak doesn’t vanish with updates
- Add installer for “apps”
- Add launcher for “apps”
- Install 3rd party ereader “app”
- Install “app” that blocks updates
- Install “app” to run a Linux terminal
- Restore the removed “disable sleep” functionality
- Limit some Amazon tracking/telemetry
1. Download the necessary files
Filenames I used to successfully jailbreak are in (parenthesis), keep in mind they will most likely be updated at some point.
- Latest release of Languagebreak from Github (LanguageBreak.tar.gz)
- Jailbreak hotfix from Mobileread (JailBreak-1.16.N-FW-5.x-hotfix)
- KUAL Coplate from Mobileread (KUAL-5b5d1d2-20231104.tar.xz)
- mrinstaller from Mobileread (kual-mrinstaller-1.7.N-r19298.tar)
- RenameOTA from Mobileread (renameotabin.zip)
- KOReader from their nightly build server(koreader-kindlepw2-v2023.10-16-gda8e23c01_2023-11-12.zip)
2. Follow LanguageBreak instructions
https://www.mobileread.com/forums/showthread.php?t=356872
My personal notes on the process:
- I found a video of the gesture to input whilst in demo mode is available here on Youtube
- The “Post Jailbreak” section of the guide wouldn’t work for me until I did a manual reboot by holding the power button.
- From the “LanguageBreak.tar.gz” file, use the appropriate hotfix file. Since I live in the United States, and speak English, I used “Update_hotfix_languagebreak-en-US.bin”
- Once the device exits demo mode (by issuing the command ‘;demo’ in searchbar), it must be re-registered again. T-Mobile “graciously” throttles my phone hotspot to 600kbps, perfect for ensuring the device doesn’t have time to download an entire OTA update during the setup.
- Once you install the LanguageBreak specific hotfix, you may need to install the generic one. (The LanguageBreak GitHub repo was not up to date at the time of this post). I used the file
Update_jailbreak_hotfix_1.16.N_install.binwith their corresponding Mobileread instructions.
3. Install jailbreak packages
I found these Mobileread instructions written by Spacequince last year for the previous Kindle Jailbreak called “WatchThis” is useful and still relevant for LanguageBreak.
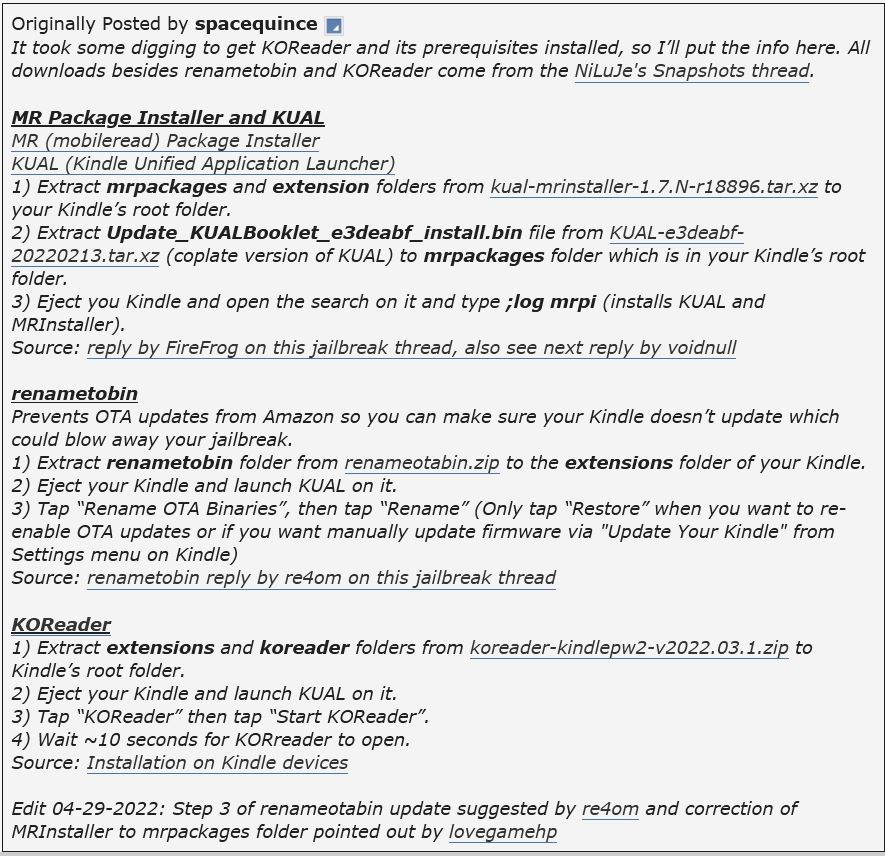
1. Install package manager, MRPI
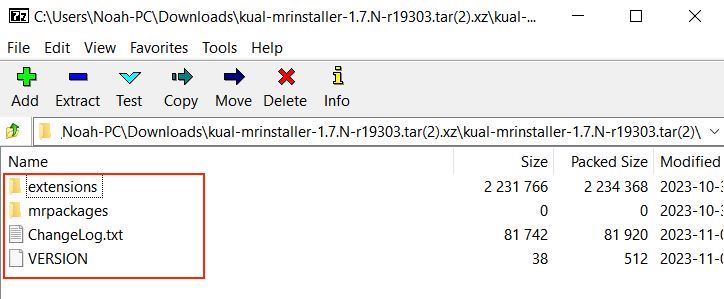
- “Install” in this case means copy-pasting all the files from the tar.xy file into the root directory of your Kindle.
2. Install package launcher, KUAL (coplate)
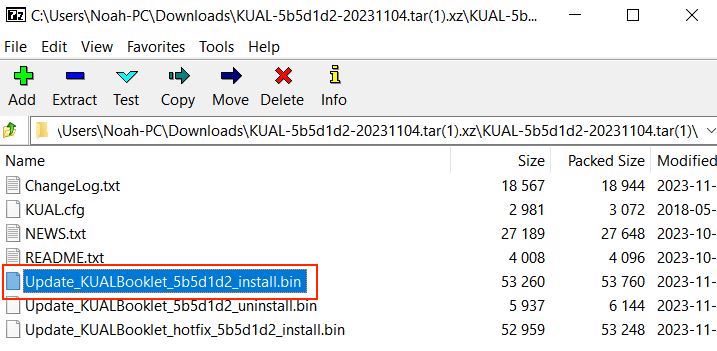
- Move the file
Update_KUALBooklet_XXXXXXX+install.binto themrpackages/folder in the root of your Kindle - Run the command
;log mrpi
3. Install RenameOTA

- Move “renameota” folder to
extensions/in root of Kindle - Launch KUAL > “Rename OTA binaries” > “rename”
4. And finally, install KoReader, the ebook reader app.
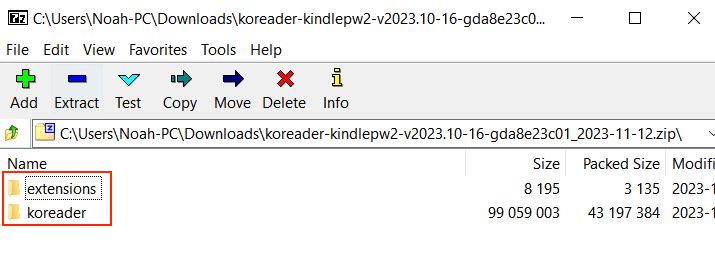
- Move files from
koreader-kindlepw2-v2023.10-16-gda8e23c01_2023-11-12.zipto the root directory of Kindle. - By default, the KOreader interface is meant for small Kindles, and the UI is huge. Change the DPI in settings to fix this. tap top menu > gear icon > screen > Screen DPI > Small (120)
By this point you should have a fully jailbroken Kindle, with all the basics installed! :)
Restore files and settings
1. Move back all your files
- If you use the “vocabulary builder” feature, move back
/system/vocabulary/as well. - Only move back files containing the string “!!PDOC!!” and “!!EBOK!!”. These contain book annotations. The rest unfortunately aren’t picked up by Kindle. If you wish to move back your notebooks, scroll down to the next section of this guide.
- Unfortunately, to reorganize sideloaded books into your collections you are going to have to do manual labor and reference the pictures you took in the “prerequisite” section of this guide. :(
2. Restore sideloaded book covers
- Most likely covers for sideloaded books will be missing. To fix: Open up Calibre while connected to your PC, so that sideloaded book covers are restored.
3. Restore Device Settings
- Personally, I opt out of the data collection privacy setting in advanced options, disable the power saver mode, disable Whispersync, and enable a passcode on my own device.
Restore individual notebooks:
Follow the directions laid out here in this Reddit post. Credit to atoms77.
- create new blank notebook on Scribe, this will be overwritten with your old notebook
- cd into folder of notebook you want to restore (hint use thumbnail folder to identify it)
- run command
(gci nbk).LastWriteTime = '10/08/2023 13:00:00'(changing the date where needed) - overwrite the “nbk” file in the .notebooks directory
- manually repeat process for each notebook :(
Optional post-jailbreak tweaks to install
Optional post-jailbreak files:
- USBnetwork for SSH and wirelessly managing books. Download from Mobileread (kindle-usbnet-0.22.N-r19297.tar)
- Kterm terminal emulator. Download from Github (kterm-kindle-2.6.zip)
How to install packages/apps
Always follow the directions in the readme, but in general to install a new application on your jailbroken kindle:
If given as a “.bin” file, e.g., USBnet:
- Move
.binfile to the ‘“mrpackages” directory- e.g.,
Update_usbnet_0.22.N_install_pw2_and_up.bin
- e.g.,
- Launch KUAL > Helper > Install MR package
Or if no “.bin” present, e.g., Kterm:
- Folder will have
config.xmlandmenu.jsonfiles - move folder to “extensions” folder in root directory, and then launch by going to KUAL > Helper > “Name of Package”
Setup SSH with PuTTY
I have found on WIndows the best app to connect to Kindle is PuTTY (download here).
After you have followed the USBNet readme to the package, you may setup authentication with your SSH client. I found this blog post , and this Mobileread thread to be helpful.
- Once you have followed the steps in the mobileread thread, and generated the keys with PuTTYgen, add them by going to Connection > SSH > Auth > “Private key file for authentication”.
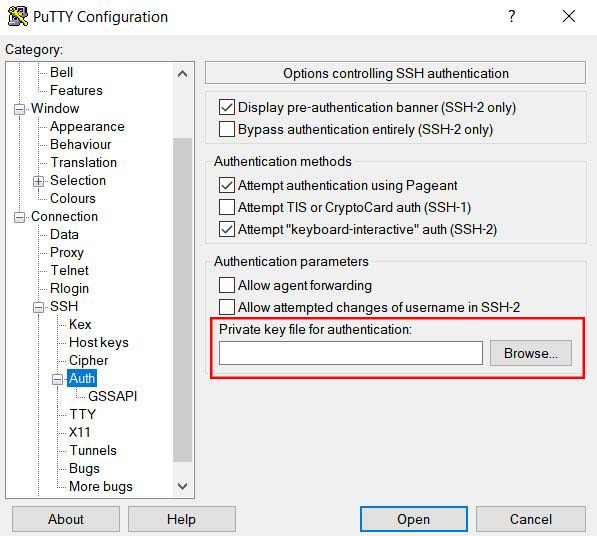
- Then return to the PuTTY launch window, input your IP address and save your settings.

While we have terminal access to the Kindle, it may also be helpful for peace of mind to check the disabling OTA updates worked. Run ls /usr/bin | grep -i .bck and make sure two files appear:
otaupd.bck
otav3.bck
Wirelessly manage files with WinSCP
Now that you have a SSH setup with USBNet from the previous step, we can now have everything we need to manage files via “SFTP”.
If you wish to know where the Kindle stores documents when connected via usb cable, it is in /mnt/us/. This is useful if you want to wireless manage files/books using a program like WinSCP
- Open WinSCP. On the login screen go to: New site > Advanced > SSH > Authentication > “Private key file”, and use the same file generated by PuTTYgen.
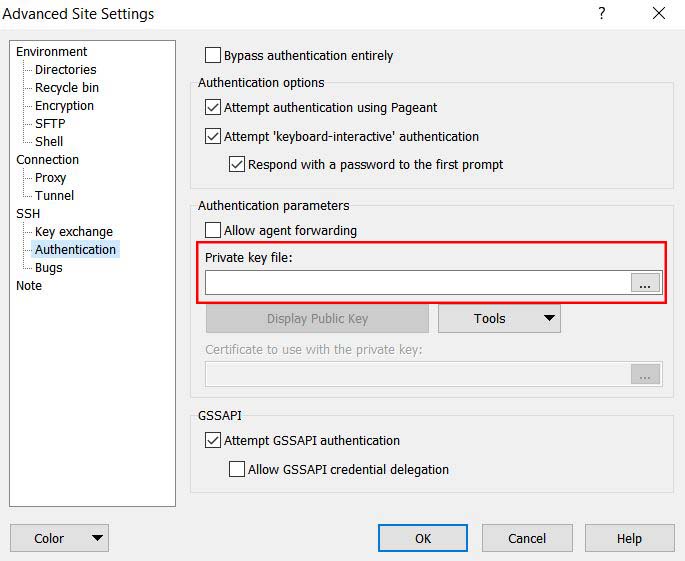
- Then input your IP Address and save the config settings.
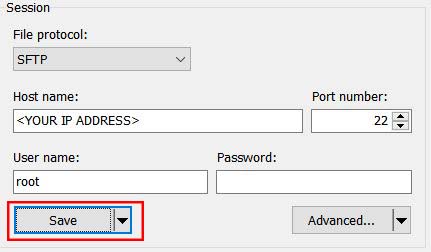
That’s it! From there you can browse files in /mnt/us as if you were connected wired by a cable.
Bonus tip: If you wish to connect to your Kindle using nothing but your phone, simply install and setup a SFTP client such as Termius for iOS. Then input ;711 into the Kindle search bar to find the device IP Address. For T-Mobile users—like myself—you may have to turn on a VPN first. And for iOS users be aware this was broken early iOS 17 releases.
Remove auto-lock / sleep after 10 minutes
Kindle devices used to have this functionality built in, we are going to restore it.
To do so:
- Disable passcode before proceeding to be on the safe side
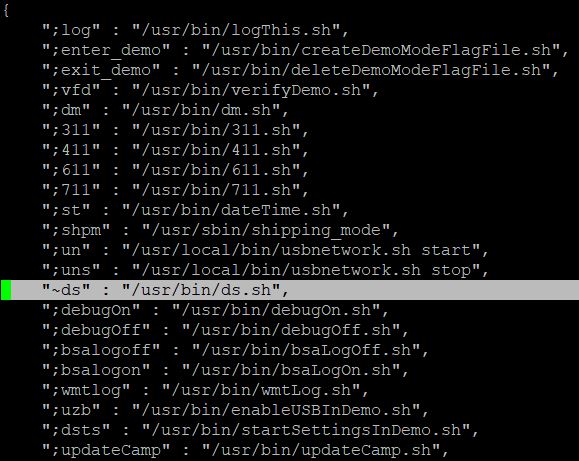
mntroot rw(mount Kindle filesystem as read-write)vi /usr/share/webkit-1.0/pillow/debug_cmds.json- Enter “i” for input mode
- Add the line
"~ds" : "/usr/bin/ds.sh",somewhere in the middle of the list of commands - Press the esc key, and enter
:xto save the file mntroot ro(mount Kindle filesystem as read-only)- Reboot your Kindle
You may also want to create a custom command so you don’t have to reboot the Kindle to re-enable auto lock. For instance something like"~es" : "/mnt/us/es.sh", where your new file es.sh contains the content:
#!/bin/sh
lipc-set-prop com.lab126.powerd preventScreenSaver 0
Now whenever you are in a situation where you want to remove the auto-lock timer, simply input ~ds into the search bar of your Kindle. Either enter ~es, or reboot to restore the auto-lock timer.
Disable logging
Source: Mobileread thread. Credit: dasmoover/mergen3107.
One method to limit Amazon telemetry is to disable Kindle logs. This may be somewhat dangerous or cause other unwanted effects if anything else relies on this logging. I have used this for years on my previous Kindles, but be warned.
# Disable Logging
mntroot rw
ln -s -b /dev/null /usr/sbin/syslog-ng
ln -s -b /dev/null /usr/sbin/loginfo
ln -s -b /dev/null /usr/sbin/tinyrot
ln -s -b /dev/null /usr/bin/showlog
mntroot ro
Modify “hosts” file
Another way to limit telemetry is through the hosts file. I doubt this is a viable way to completely block telemetry. But worst case scenario all it does is clear up my Pi Hole logs.
Some telemetry domains that I chose to block, and are safe to do so:
mntroot rw
echo "127.0.0.1 device-metrics-us-2.amazon.com" >> /etc/hosts
echo "127.0.0.1 device-metrics-us.amazon.com" >> /etc/hosts
echo "127.0.0.1 device-metrics-us-ud.amazon.com" >> /etc/hosts
echo "127.0.0.1 device-messaging-na.amazon.com" >> /etc/hosts
mntroot ro
130+ domain hosts file
For the paranoid, I have compiled a comprehensive (but not complete) list of domains the Kindle connects to. You can download the hosts file here. BUT since it interferes with so much functionality, I would advise AGAINST using it unless you have some super insane threat model.
Warning: The Kindle Scribe upon first boot requires you to register the device via the internet; Blocking the wrong domains used in registration may prevent you from registering and henceforth lock you out of the device.
Therefore if you carelessly block domains(like with the 130 domain hosts file I have linked), you may end up with a “soft-brick”. Do not block random domains and do a factory reset without restoring the default hosts file, doing so will lock you out of the device. I was scared out of my gourd when this happened to me, and but luckily for me, I remembered how to remove the jailbreak, which I describe in the following section this post.
Note on Mobileread"rescue pack"
Sidenote: Mobileread has two packages meant to save you from bricking your device: “Rescue Pack”, and “Coward’s Rescue Pack”. If you end up in a situation like mine, you may be tempted to install these to be safe. Do NOT install these on Kindles newer than the PaperWhite 5 (inc. the Scribe). These new devices lack the partition that enables it to work on the older devices, and they are useless at saving you from a brick (all the more reason to be cautious when messing around with things).
Concluding thoughts
“What about customization?”
Unfortunately in my research it seems there is very little customization opened up by jailbreaking. Custom screensaver mods have had user reports of soft-bricking the device. Modifications to the reader app appear fruitless—locked behind a proprietary binary file. The homescreen obscured behind Hermes bytecode. And so on and so on.
Other modifications have potential, like setting book covers for PDF files by modifying the “cc.db” database. But to my knowledge, no one has risen up to make a proof-of-concept for this cosmetic modification.
Ultimately most of my desired customizations are unachievable at the current time. Which is a shame, since it was a big part of why I originally went through all this trouble.
Updates after jailbreaking
To update the system:
- Make sure there are no breaking changes from an update on Mobileread forums. If in doubt, make a post asking if it is safe to update.
- IF verified as a safe update, disable any “extreme” modifications that change system files (e.g like modifying the system logging files for analytics). This is only to be on the safe side. IIRC updating replaces all firmware files anyways so it might be redundant.
- Disable RenameOTA by opening it in KUAL, and clicking “restore”. Then update as normal. When finished, apply jailbreak hotfix and reboot 2 times. Be aware you may have to reinstall some modifications after updating. (E.g hosts file and disable sleep adjustments)
To update jailbreak files:
- Update KOreader by clicking the upper right hand hamburger menu > Updates > check for updates
- Update extensions/packages by going redownloading them, and following the individual readme instructions.
How to remove jailbreak
Maybe you brick’d your device like me, are planning on reselling your device, or maybe you just have some other need to remove jailbreak. Here is how I do so:
- Connect to usb, and Copy any files you want off the device (e.g. with FreeFileSync)
- Place an empty file named
DO_FACTORY_RESTOREin the root of Kindle. (download available here) - Reboot Kindle, it will factory reset and go to the registration screen.
- When Kindle powers back on, plug into PC, and add an <update>.bin file that matches your current version, (Downloads available at Softpedia)
- Reboot Kindle by holding down power button
- Setup as normal
Resources
If you need help troubleshooting, the best place to ask is on the Mobileread forums.
Otherwise here are some misc. links I found helpful putting this post together:
Documentation:
- https://github.com/sgayou/kindle-5.6.5-jailbreak/blob/master/doc/README.md
- https://manual.calibre-ebook.com/
- https://koreader.rocks/user_guide/
- https://explainshell.com/
- https://wiki.mobileread.com/wiki/Kindle_Touch_Hacking#Architecture
Instructions to jailbreak:
- https://www.mobileread.com/forums/showthread.php?t=320564
- https://kindlemodding.gitbook.io/kindlemodding/post-jailbreak/installing-kual-mrpi
- https://blog.fabricemonasterio.dev/kindle-jailbreak/
Why jailbreak:
- https://git.sr.ht/~sotirisp/kindle-hacks
- https://www.mobileread.com/forums/showthread.php?t=324074
- https://www.mobileread.com/forums/showthread.php?t=315299
Bonus: Extract Kindle Firmware
If you wish to perform your own modifications, it may be useful to have a browse around with a copy of the firmware files on your computer. If you want to mount the Kindle firmware, follow these steps (via Linux, WSL2, or maybe macOS):
- Download firmware, (e.g. from (Softpedia))
- Download KindleTool to extract the firmware
$ cd ~/Downloads/kindletool/
$ ./kindletool extract update_kindle_scribe_5.16.2.0.1.bin firmware
- Extract the rootfs.tar.gz file produced from the previous step. You should be left with a rootfs.img file
- Mount the file with the following commands:
$ cd firmware/
$ mkdir kindlemountpoint
$ sudo mount -o loop fwo_rootfs.img kindlemountpoint/
And from there you can look around as you please.
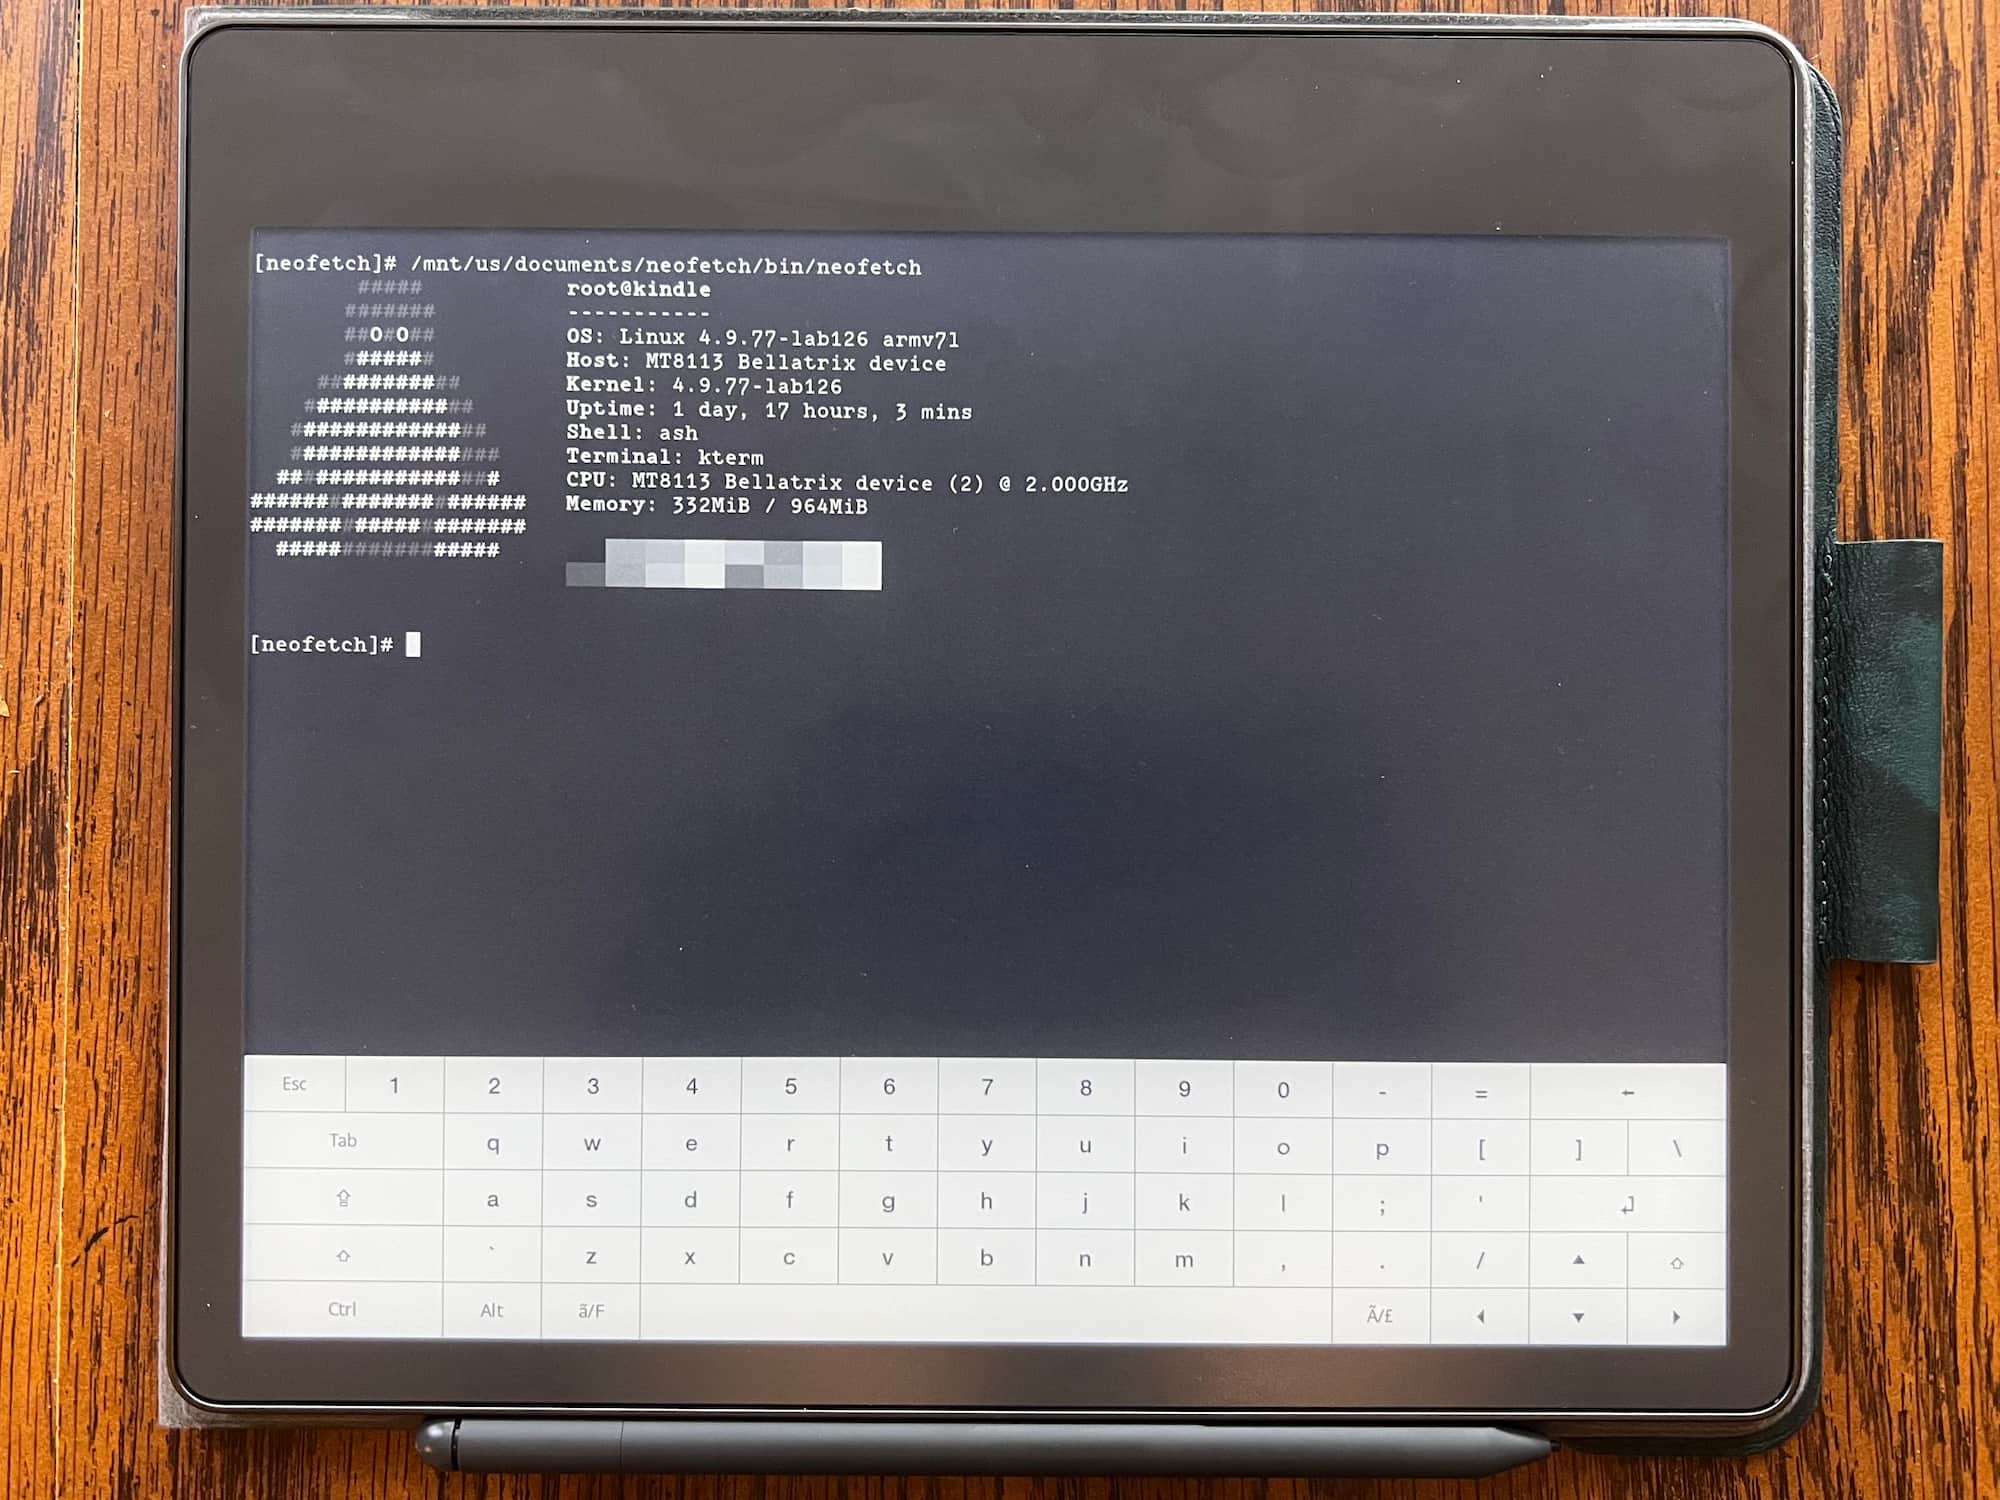
Kindle Scribe Specifications
System Specs:
- SOC: MT8113
- CPU governor: ondemand
- CPU frequency: 2GHz
- CPU cores: 2
- RAM: 1Gb
- Battery size: 3000mAh
- Battery voltage: 4.4v
- Kernel: Linux 4.9.77-lab126 (circa 2018)
Once you have either jailbroken or extracted the firmware files, you can then poke around to find some information on the hardware specs. I believe this is interesting/worthwhile since Amazon doesn’t offically publish them anywhere.
cat /sys/devices/platform/10019000.i2c/i2c-1/1-004b/bd71827- -- power.4.auto/power_supply/bd71827_bat/charge_fulllists the battery capacity at “2975000”. Units are in “ampere hour” divide by 1000 to get milliamp-hours(mAH). I’m assuming my battery has degraded from the factory 3000 mAh value.cat /sys/devices/system/cpu/cpufreq/policy0/scaling_governorlists the CPU governor as “ondemand”cat /sys/devices/system/cpu/cpufreq/policy0/scaling_max_freq && cat /sys/devices/system/cpu/cpufreq/policy0/scaling_min_freqlists cpu frequency as 600MHz - 2GHzfree -mfrom a terminal session on-device lists the ram at 1G, up from the .5G of previous models.cat /sys/class/power_supply/<number>_bat/voltage_maxlists the end of charge voltage at 4.4v, some older models used 4.2v batteries.
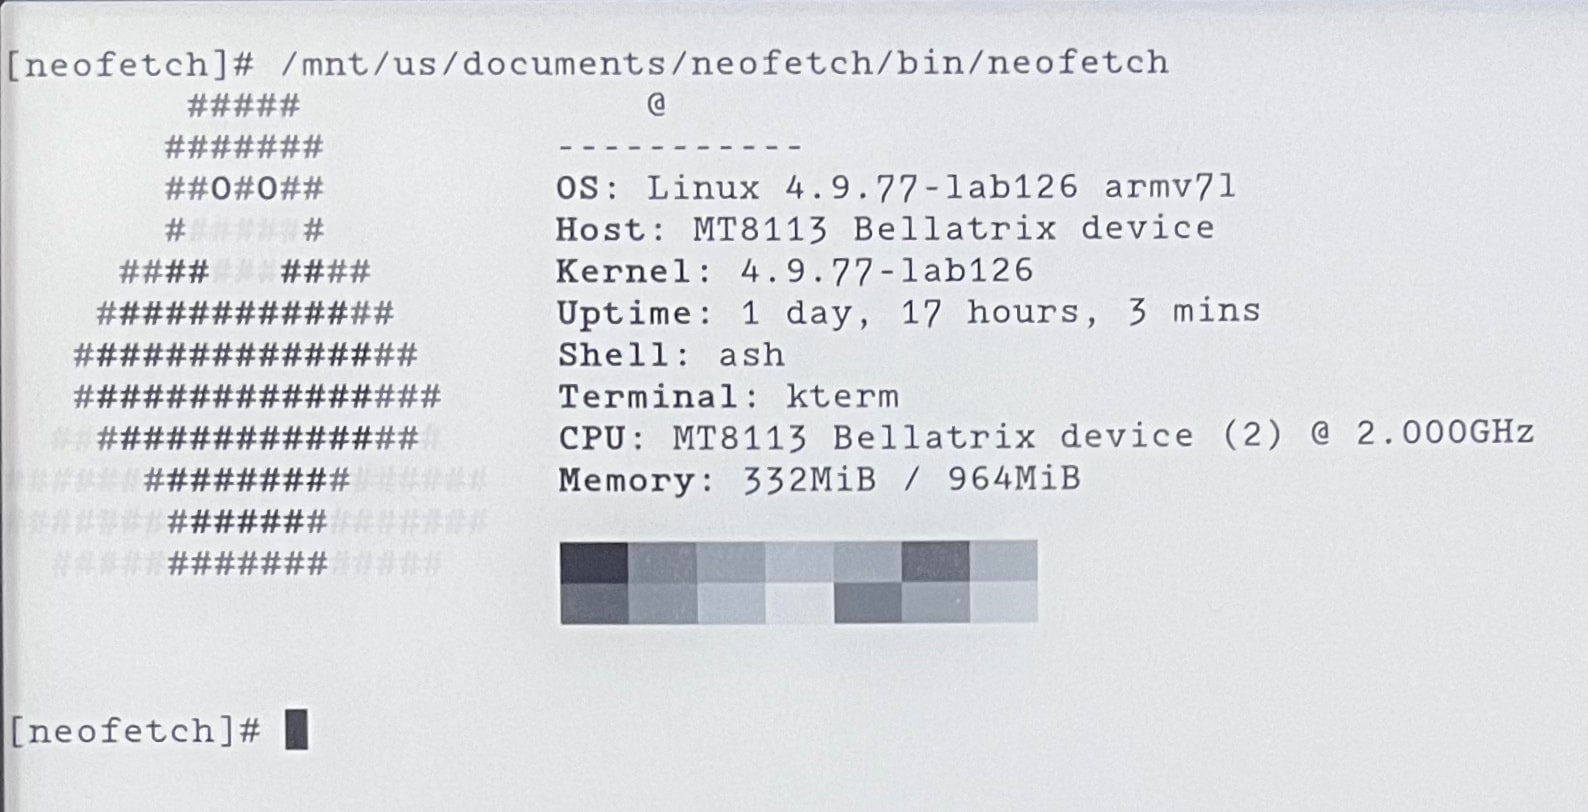
Alternatively, you can just install Neofetch to give you a nicely formatted image of a device’s hardware specs.